Saturday, June 18, 2011

Organizing Your Business -The Office Space-

GET YOUR PAPERS ORGANIZED
The Container Store
"Bristol" Desktop File $24.99 each
So during my busy moving mode (Moving boxes, reorganizing everything I own) I decided my office/desk area needed a little attention. I actually started before moving, by purchasing some really nice portable file boxes at target. Here's a similar one from the container store shown on the right.

I now have a file system for my business documents as well as my household management. (recipes, bills, school papers, receipts)

I have files for each client that contains a CD with all the .pdf files used for their project in case reprints are needed, as well as my copies for their payment(s) from both etsy and PayPal. The folder also contains a form that includes all their contact information deadlines for their project, design notes, and misc. information.

SUPPLY and Demand 
As I work with a lot of paper in my business, I needed to find a good way to keep everything visible and neat. I found some great magazine organizers from Tuesday Morning that I can keep near my work area but nothings all over the place. My card stock is organized by color, and my scraps are kept again organized by color in the back of my desktop file.

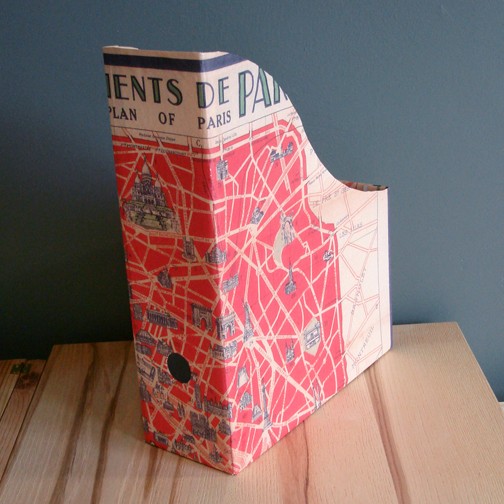
Magazine Holder by bashfulbunnie on ETSY
My other supplies are kept organized in recycled boxes with lids left over from last Christmas. Each box is labeled with what it contains. As these supplies are used less then others this system works well for me. If you need to organize more frequently used supplies think about using clear storage containers to allow you to see what is within. (Best for when your in a mad dash attempting to look for a specific item)

My pens, markers, rulers and other items I need within reach for moments of inspiration are kept on my desk in small white pails I found in the dollar spot at Target. They are metal and about 4 in. tall and are a great decor addition as well as serving their organizing purpose. I also use glass jars up-cycled after holding our store bought salsa and other condiments.

THE ORDERS ARE FLOWING
To keep my in process orders in well order, I use a clip board system. The first holds my new orders, the second holds in process orders, and the third holds orders to be shipped. Each order has its own file so that after its shipped it can be placed straight into the filing system. I also have a small clipboard that holds all my receipts for supplies, shipping, and printing services. Each is hung on the wall to keep in plain sight so that I don't get behind while focusing on my full time job of MOM.

Alternatively I have seen boards with bulldog clips secured to them that can serve the same purpose.

DESKTOP DETAILS
Only leave out what you need to do day to day activities in your work space. These highly used items should be within sight and be neat to allow for you to do the most important thing, work on your business. Opposed to finding your blue marker that is now located under the couch on the other side of the room. I found these awesome paperclips that allow you to clip together what needs immediate attention, what needs filing, what needs to be read and so on.  (Again the dolor spot at Target)

THE BIG STUFF
When deciding where the printer goes or where to put other hardware, place them by frequency of use. If the printer is used on a daily basis keep it near you and accessible, not on the other side of the room. Organize the layout of your work space into zones. For instance I have my desk which encompasses all my files and order processing systems. This is my management area of my business/office. Next I have my staging area. This is currently my dining room table, but all the supplies I would need to assemble an order or process it for shipment is stored neatly below. Lastly, I have a reference center that contains books on paper crafts, manuals, magazines, and catalogs from my regular suppliers.

I hope this short run down of how I got my space to work for me, instead of against me inspires you to do the same. I will post regularly with tips and suggestions to get you more organized and waste less time.

Do you want to share your tips on organization? OR how you put together a system that works for you? - email me at inspiradesigns@gmail.com

***DONT FORGET*** The team organization challenge due date is July 1st. Send me a before and after of your space to the e-mail above to enter. The team member with the best submission and ideas will win a set of 10 Spring Dahlia Thank You Cards with Cotton Envelopes - designed by me.

Monday, April 18, 2011

April Meetup!


This past weekend we had a fabulous meetup with some of the members of the team! We spent time going over Etsy basics, shop setup and helped share and critique one another's shops.
It was a relaxed enjoyable afternoon, filled with creative sharing.

Be sure and check out some of the great Etsy Shops that joined us that day!

Meredith Dada

Lauren Snyder

Cmbstudio

Moonjewelsandmosaics

McCoy Knits and Real McCoy

Claudiacreates

PurpleMoonDesigns

Suncatcreations

Anuart

Remixed Vintage

PeregrineBlue and Boubelina2

Caren Silvestri

Sunday, March 27, 2011

Pesky Product Photos...

It's one of the most daunting tasks for many of us Etsy sellers...how to take quality photographs of our work without getting a degree in professional photography. One of our members found this wonderful tutorial recently, that helps create beautiful crisp photos; using mostly household items!

Be sure and check it out!

http://www.handmadespark.com/blog/studio-quality-product-photography-with-a-12-set-up-guest-post-from-via-u-photography-blog/

Friday, February 25, 2011

Your Etsy Shop...a few basic tips.

You've picked a shop name, you've registered as an Etsy seller, you've got products to sell and.....now what? You list and sell right? Right! But there is also so much more to be aware of.

Opening an Etsy shop can be a daunting experience, so here's a few helpful hints to help your shop look and feel professional and eye catching for potential buyers.


  1. Profile picture: In the world of Etsy, your shop name and your avatar (or profile picture) are the two main ways people are going to recognize you. So, don't skimp on the picture. Use either a photo of yourself that emphasizes your craft or your shop style, or a photograph of a currently “for sale” item in your shop; but make sure you put something. You can add or change a profile picture by clicking on My Account/Profile and browsing for a picture on your computer. Then scroll to the bottom of the page and click SAVE

  1. Fill out your “About” section (or your bio). This helps a buyer feel more at ease and more secure purchasing from someone who has taken the time to share something about themselves. Just like we enjoy knowing something about companies we purchase factory made items from, it helps to know something about the person your are purchasing handmade items from. Share your “creative” story, talk about your products, or even just welcome customers to your shop, but be sure and take a few moments to put something in this section.

    You can edit this section by clicking on My Account/Profile and scrolling down to the About section.

  2. Location, location, location. You don't have to be extremely specific; but put something. Whether it's United states, California, Ventura County, etc it helps buyers to have a general idea of where their product is coming from.

  3. Shop Banner- Make one!!! This is like a storefront sign that welcomes your customers into your shop. It should match the theme of your shop and be easy to read. If you sell pastel colored floral jewelry, it's probably not a wise idea to use a neon banner with guitars on it. Some great ideas involve adding images of actual items in your shop, or creating a basic banner with the general color scheme of most of your items or even having one made for you, if you have a hard time with it.

Here's a great link for banner tips from Etsy:

http://www.etsy.com/storque/seller-handbook/seller-how-to-banner-tips-6265/

  1. Item photography...there will be more about this later; but let's start with this...keep it simple! The most important thing is to showcase your items as crisply and professionally as you can. Most items are first seen on a small thumbnail scale and it's important to remember this when shooting, so that you can catch the viewer's eye right at that moment. Because how will they ever see your shop, if they never click on the thumbnail? Also, be sure and try to use all five photo slots. Why not? It's one of the best ways to showcase your work from all angles.

Here is an AMAZING link to a wonderful Etsy photographer's blog that give a very helpful easy guide to shooting product photography.

http://www.bomobob.blogspot.com/2010/07/50-cent-lightbox.html

  1. Item descriptions...Be detailed! The biggest thing to remember is that a buyer can't touch or feel your item on the Internet, so photographs and descriptions are essential to convincing a customer that your product is worth buying. Some sellers opt for straight forward thorough descriptions, others opt for creative stories and advertising. Whatever your method, just make sure you get the most important details of your piece (such as size, materials, colors, etc) in the description to attract buyers and avoid any confusion.

  2. Shop policies...FILL THEM OUT!!! No, seriously...do it. This is a huge part of being a professional, successful seller. This not only makes your buyer aware of how you handle your business, but also helps to safeguard you with any possible disputes.

  3. And last but certainly not least, Item tags. Be sure and use all of your tags that pertain to the description of your item. These tags help people to find your item when they search Etsy's site. If you find yourself having a hard time using all your tags, try to get creative. For example, if you are selling a piece with a bee and a flower on it, you can use words like bug, insect, flower, nature, garden, spring, etc. The possibilities are endless...just make sure the tags you use do actually apply to the item you're selling.


Hopefully some of these tips can enhance your shop and help you to put your best foot forward! If you want to see these techniques in action, check out a few of these great shops from the Ventura County Handcrafted Etsy Street Team:


Meredith Dada Mixed Media Artist


Jessie McCann Handcrafted Jewelry


SugarSkull7 Hand carved Stamps and Fine Art


byTonetti Handcrafted Wire Wrapped Jewelry